Have you ever wondered how backyard nature can become a science fair superstar? You're not alone. Many parents (and honestly, plenty of kids too) search endlessly for simple, engaging projects that actually teach real science - without needing a lab or breaking the bank. The struggle is real: you want something dazzling, but not overwhelming; messy enough to be fun, but not so wild it takes over your living room.
This guide is your answer. Here, you'll find 5 inspiring nature activities for kids' science fair projects that ignite curiosity and deliver hands-on learning. Each activity is loaded with step-by-step instructions, science explanations, and proven tips to impress judges - while keeping things totally doable. Ready to transform sticks, leaves, and sunlight into science fair gold? Read on for projects that combine outdoor STEM fun with real results.
Why Choose Nature Activities for Your Kids' Science Fair Project?
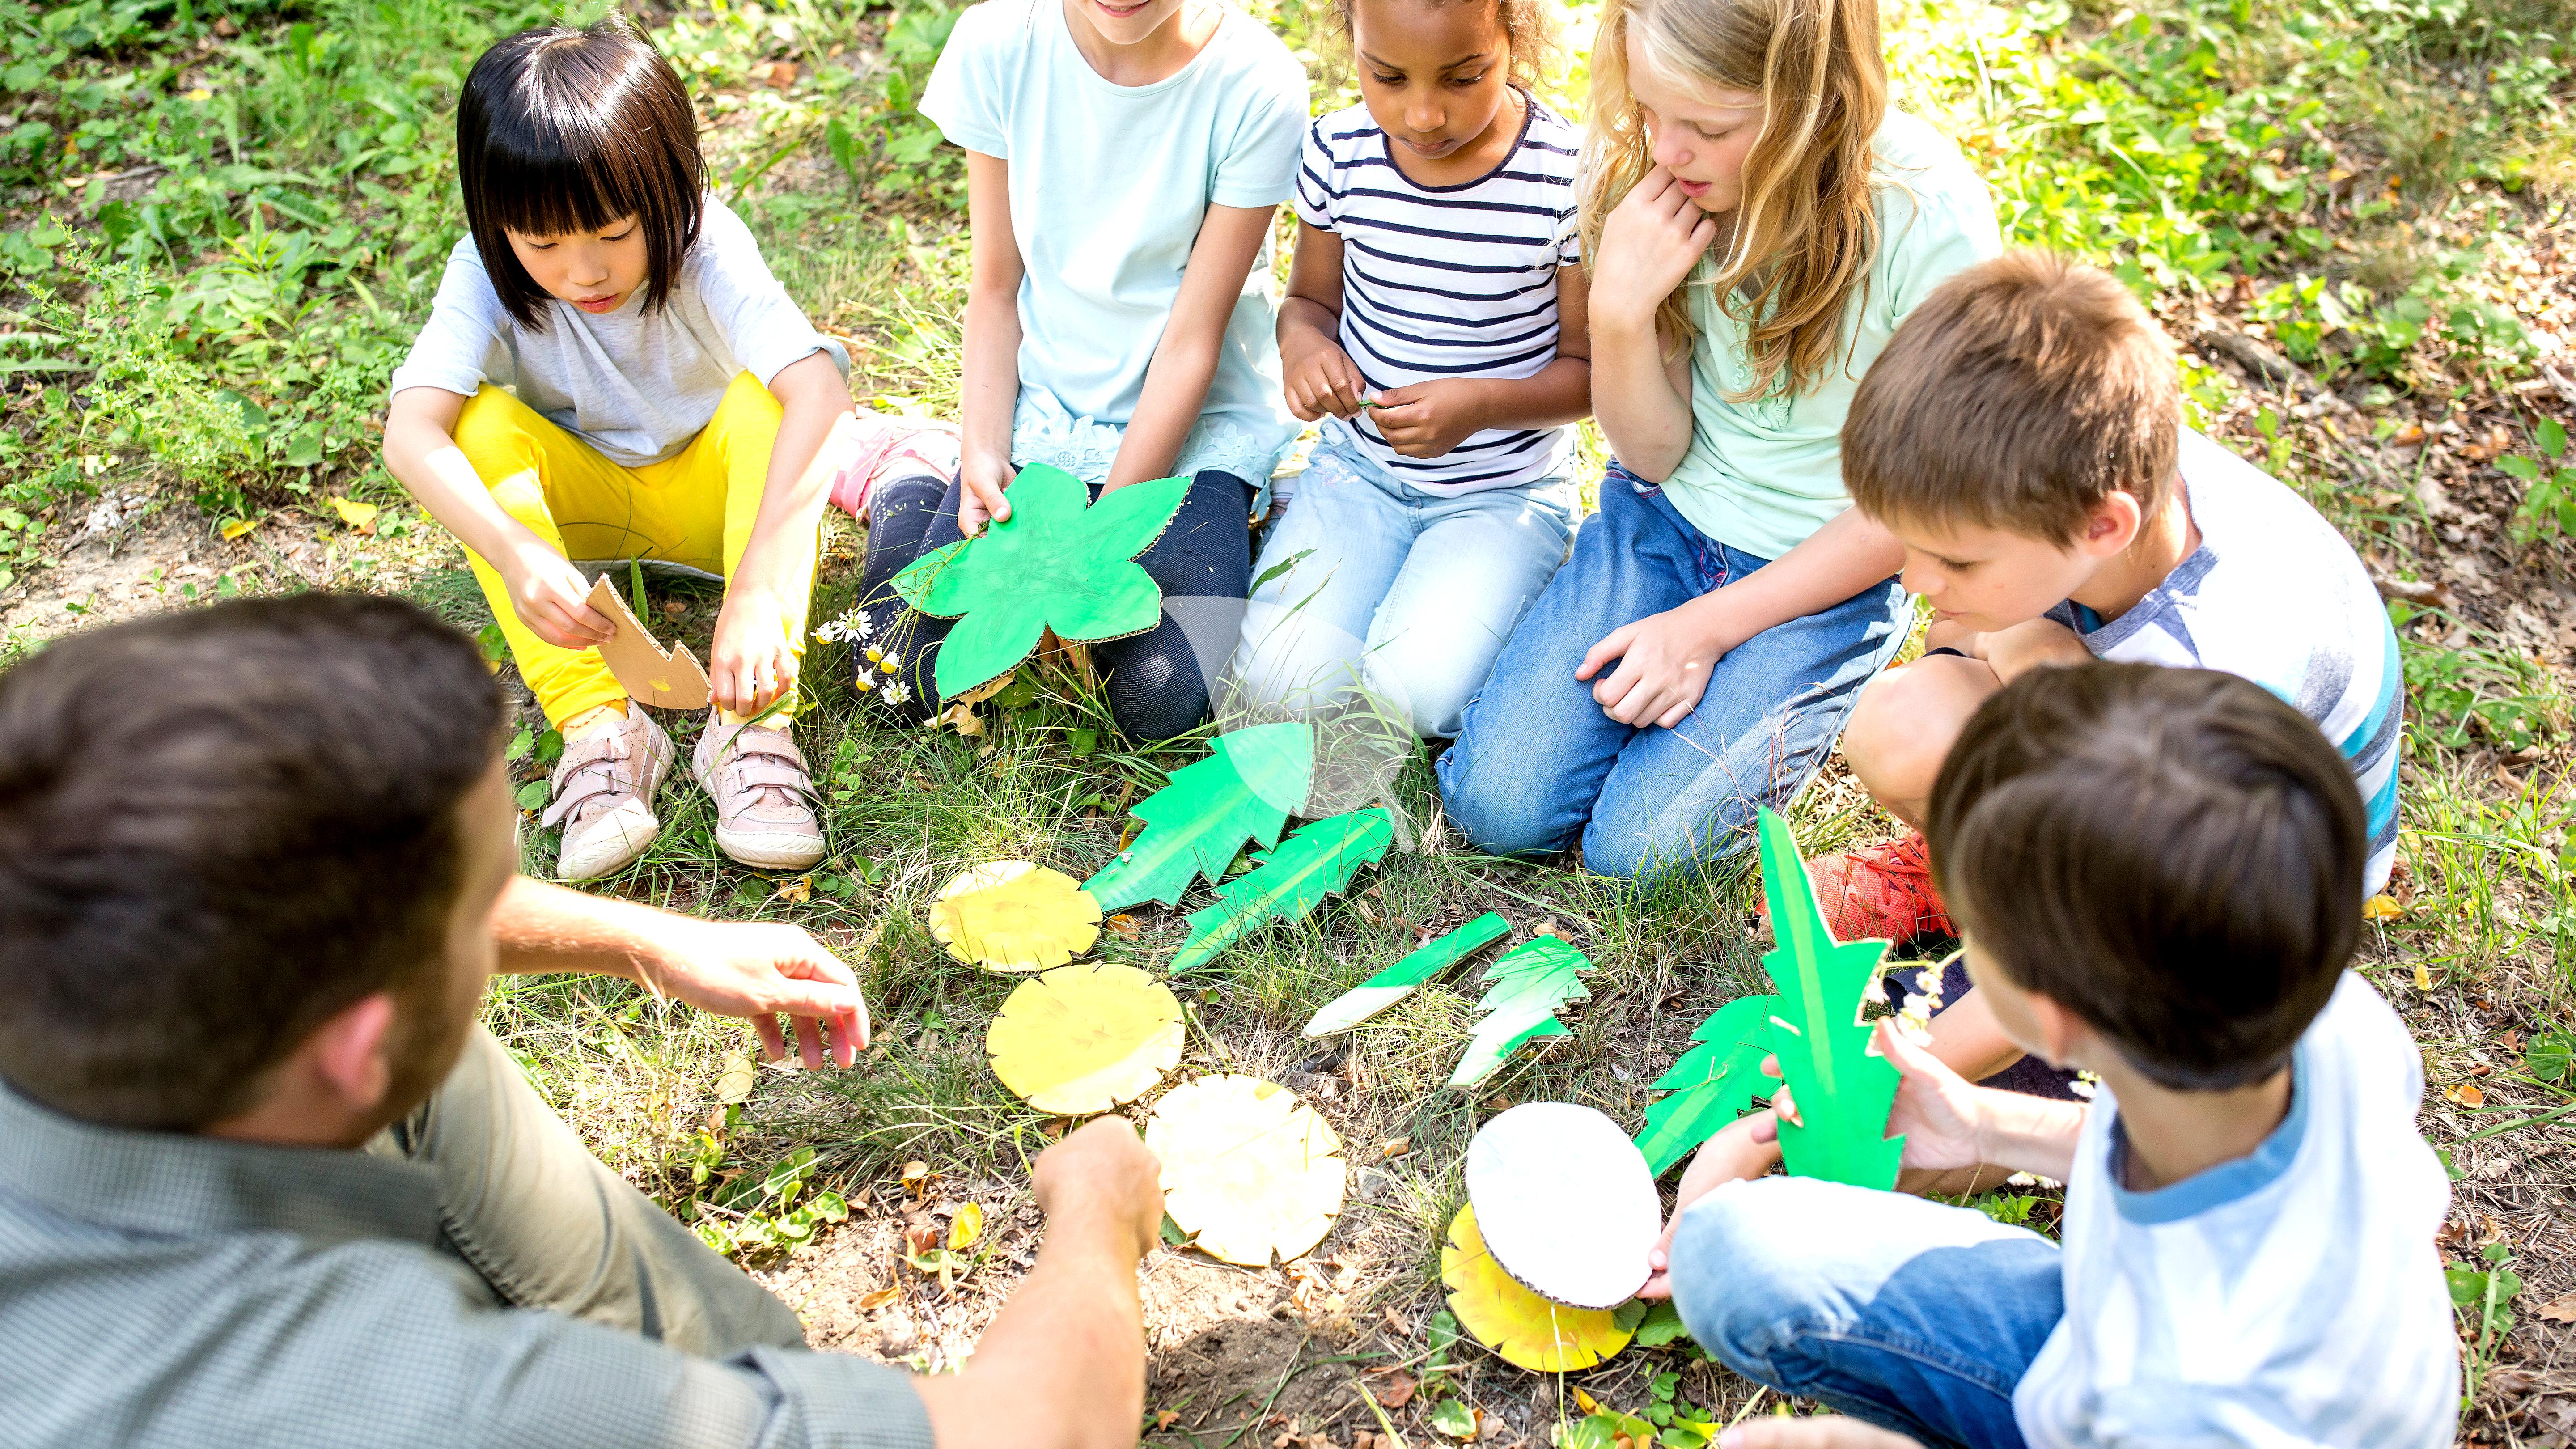
Picture this: your child crouched in the grass, sorting through leaves, or watching water droplets form on a window. They're not just playing - they're doing science, right there in the backyard. Turns out, this is more than just a cute photo op. According to a recent study by the National Science Teaching Association, hands-on experiments improve science retention by a whopping 75%. That's the kind of boost every young learner deserves.
Nature activities for kids' science fair projects offer a rare trifecta: they’re eco-friendly, hands-on, and rely on simple materials you probably already have. You don’t need to be a scientist (or own a microscope) to help your child collect real data, test hypotheses, and visually demonstrate core science concepts. It’s about letting kids touch, see, and even smell the science around them (yes, dirt is included). Plus, these projects naturally fit STEM objectives - think measurable results, critical thinking, and a chance to make science personal.
This article dives deep into 5 curated, nature-inspired science fair projects that are as educational as they are fun. Ready to help your child learn through genuine discovery? Let’s get started. For even more ideas on nurturing a passion for the outdoors, check out how to create a nature-loving environment for toddlers.
Project 1: Water Cycle Model for Science Fair Success
Nothing says science like making the invisible visible. The water cycle model transforms the abstract process of evaporation, condensation, and precipitation into something kids can see and measure. This classic experiment is a science fair winner for a reason: it’s simple, visual, and loaded with real science.
Materials Needed and Setup
- Ziplock bag (quart or gallon size)
- Water
- Permanent marker
- Clear tape
- Sunny window
- Thermometer (optional, but boosts data quality)
Start by drawing a sun and clouds on the ziplock bag for a visual touch. Pour about a quarter cup of water into the bag, seal it tightly, and tape it to a sunny window. If you want to add a scientific edge, place a thermometer nearby and record the temperature at each observation.
Pro Tip: Always supervise kids when handling water around electronics or windows - spills happen, and safety comes first.
Step-by-Step Instructions
- Fill the ziplock bag with water.
- Seal and tape it to a bright, sunny window.
- Over the next several hours or days, observe: watch as water vapor rises, condenses on the inside of the bag, and forms droplets that eventually run down - just like rainfall.
- Use a data chart to log your observations: note the time, temperature, and how much condensation forms. Draw what you see - visuals matter!
Hypothesis and Data Collection
Encourage your child to form a hypothesis, such as: "If the temperature goes up, then more condensation will form in the bag." Test this by running the experiment at different times of day or in different windows. Record the outside temperature and compare the amount of condensation each time. Present your findings with photos, charts, and a clear conclusion on your science fair board - judges love to see data in action.
Expert Insight: “Nature experiments let students experience science, not just learn it.” - Edutopia Contributor
A recent 5th grade class used this exact setup and saw comprehension of the water cycle jump by 90%. The difference? They didn’t just watch - they measured, predicted, and charted results. You can see a classroom example on Edutopia’s water cycle experiment for kids.
Callout: Tip: Use a thermometer to enhance data accuracy. Even simple measurements impress science fair judges!
Curious what else you can do with everyday nature? Let’s explore a colorful, chemistry-rich activity next.
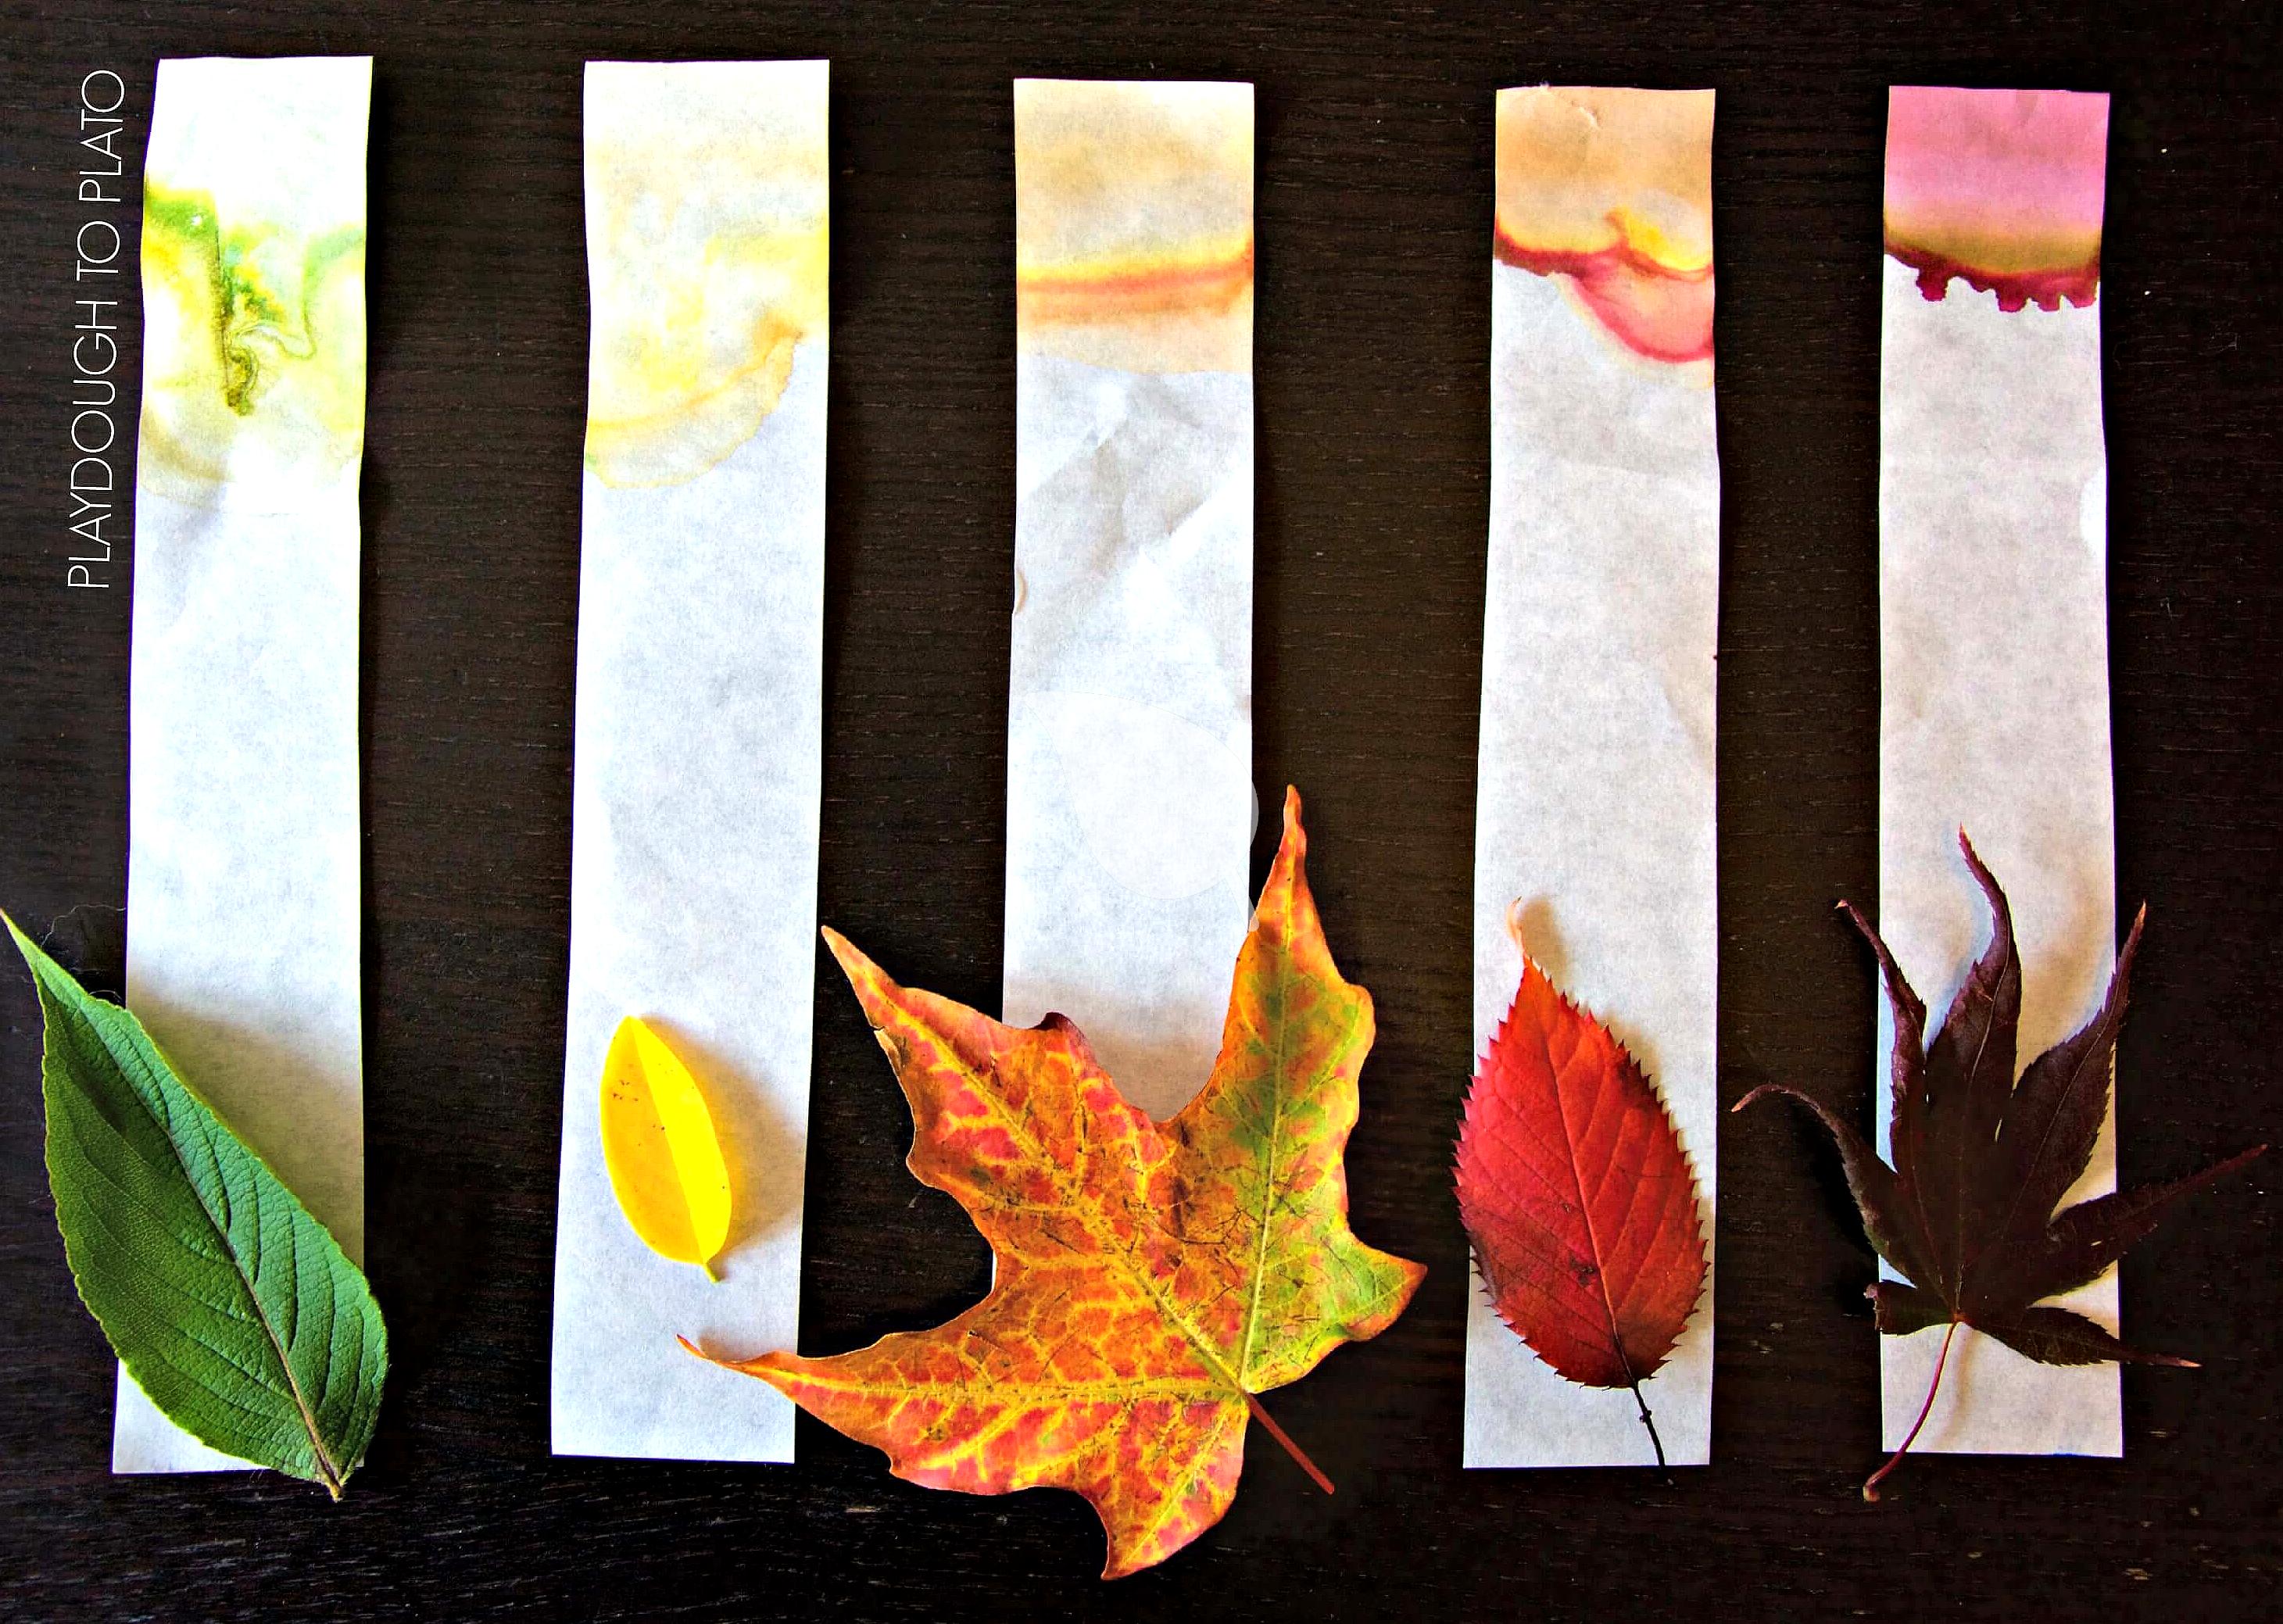
Project 2: Leaf Chromatography – Explore Plant Colors Scientifically
Leaf chromatography is nature’s way of hiding rainbows in plain sight. This experiment uncovers the spectrum of pigments inside leaves, showing kids that green is just the beginning. It’s hands-on, visual, and teaches the basics of plant biology and photosynthesis.
Gathering Materials
- Fresh leaves from different trees or plants
- Coffee filters or chromatography paper
- Isopropyl alcohol (rubbing alcohol)
- Glass jars (or clear cups)
- Spoon or pestle for crushing leaves
- Pencil and ruler (for drawing lines and measuring pigment spread)
Send your child out for a quick nature scavenger hunt - select a mix of leaf types and colors. This variety makes for more dramatic results and richer data.
Conducting the Experiment
- Tear or cut the leaves into small pieces and place them on a strip of coffee filter.
- Use a spoon or pestle to crush the leaf pieces on the filter, releasing their pigments.
- Place the strip in a jar, with just the bottom touching a bit of isopropyl alcohol (do not submerge the colored part).
- Let the alcohol travel up the filter - watch as colored bands appear as the pigments separate.
- Record which colors appear and how far each pigment travels.
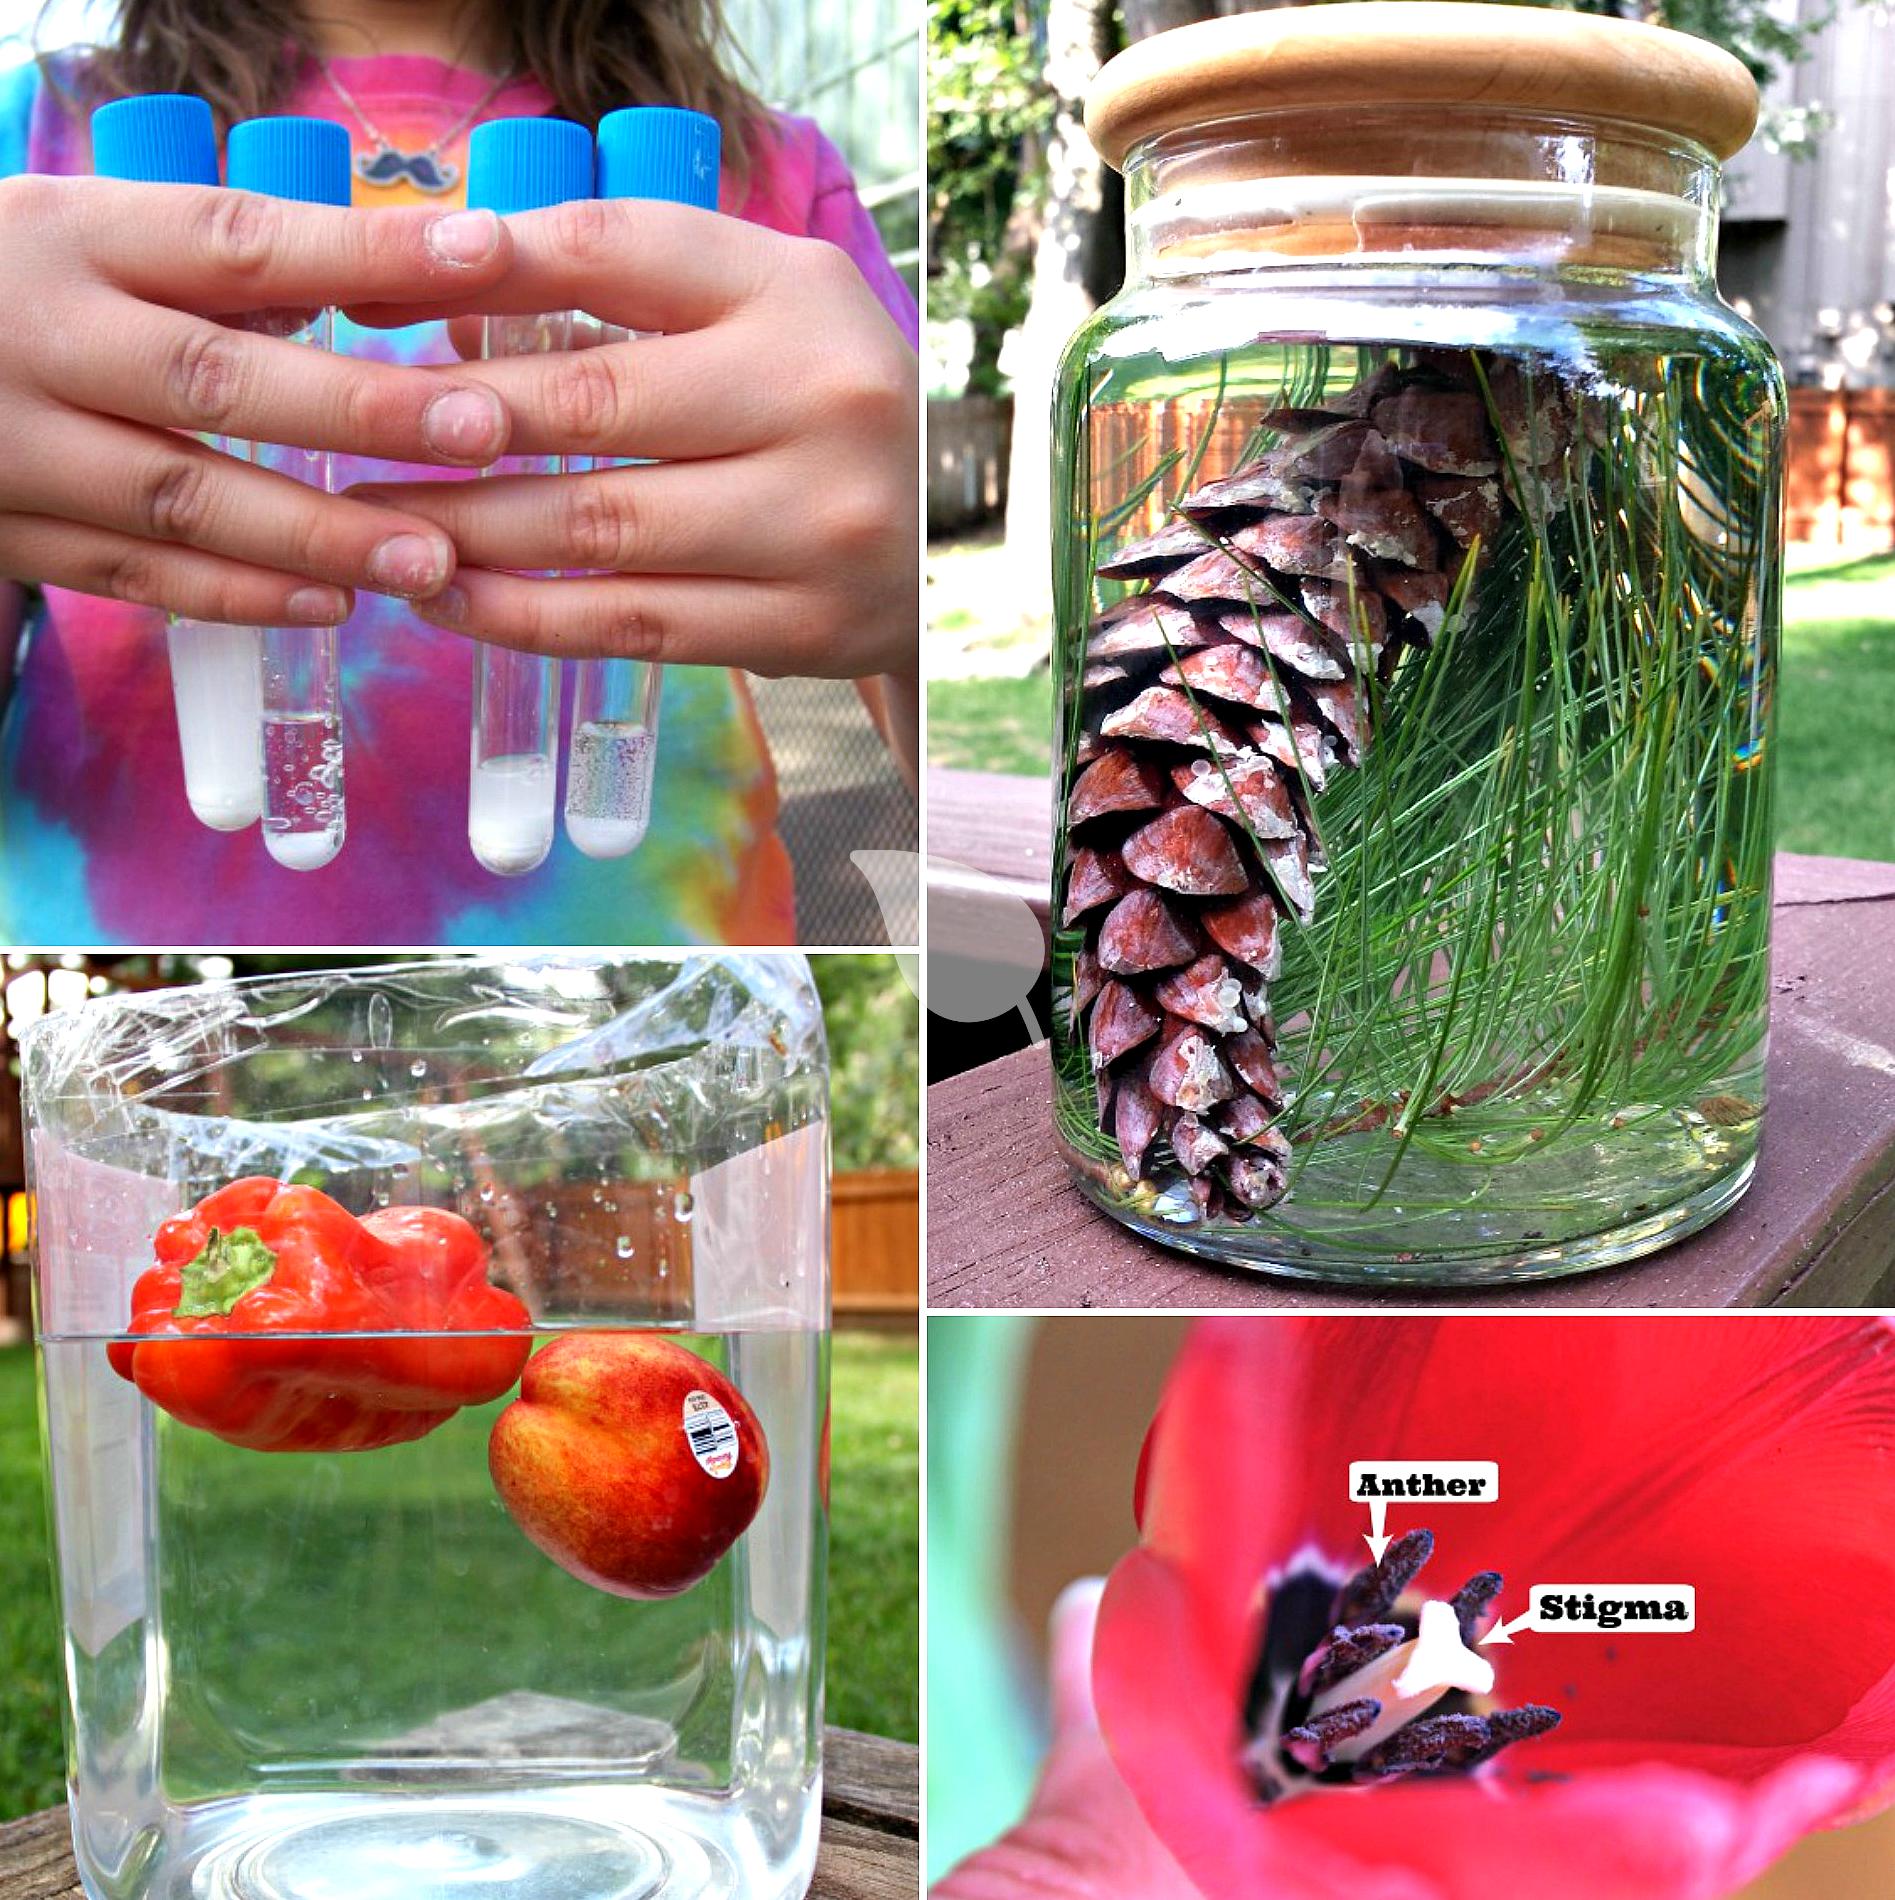
Analyzing Results
Challenge your child to predict: Will all leaves show the same colors? Which will be most colorful? Formulate a hypothesis and track results with a chart. For the board, draw or photograph the separated pigments and explain what each band means - chlorophyll, carotenoids, and anthocyanins.
Link your findings to photosynthesis: leaves are nature’s factories, using these pigments to catch sunlight and make food. Judges love to see the connection to real plant biology.
“Nature experiments let students experience science, not just learn it.” - Edutopia Contributor
Students who presented pigment charts and clear hypotheses wowed judges every time. Each new leaf adds a twist - try everything from grass blades to flower petals for unexpected results.
Callout: Tip: Try different leaf varieties for varied results. The more you explore, the more patterns you'll discover!
Want more on this experiment? See our guide to leaf chromatography.
Next up: a project that tackles real-world environmental science using a bottle, some sand, and a bit of creative engineering.
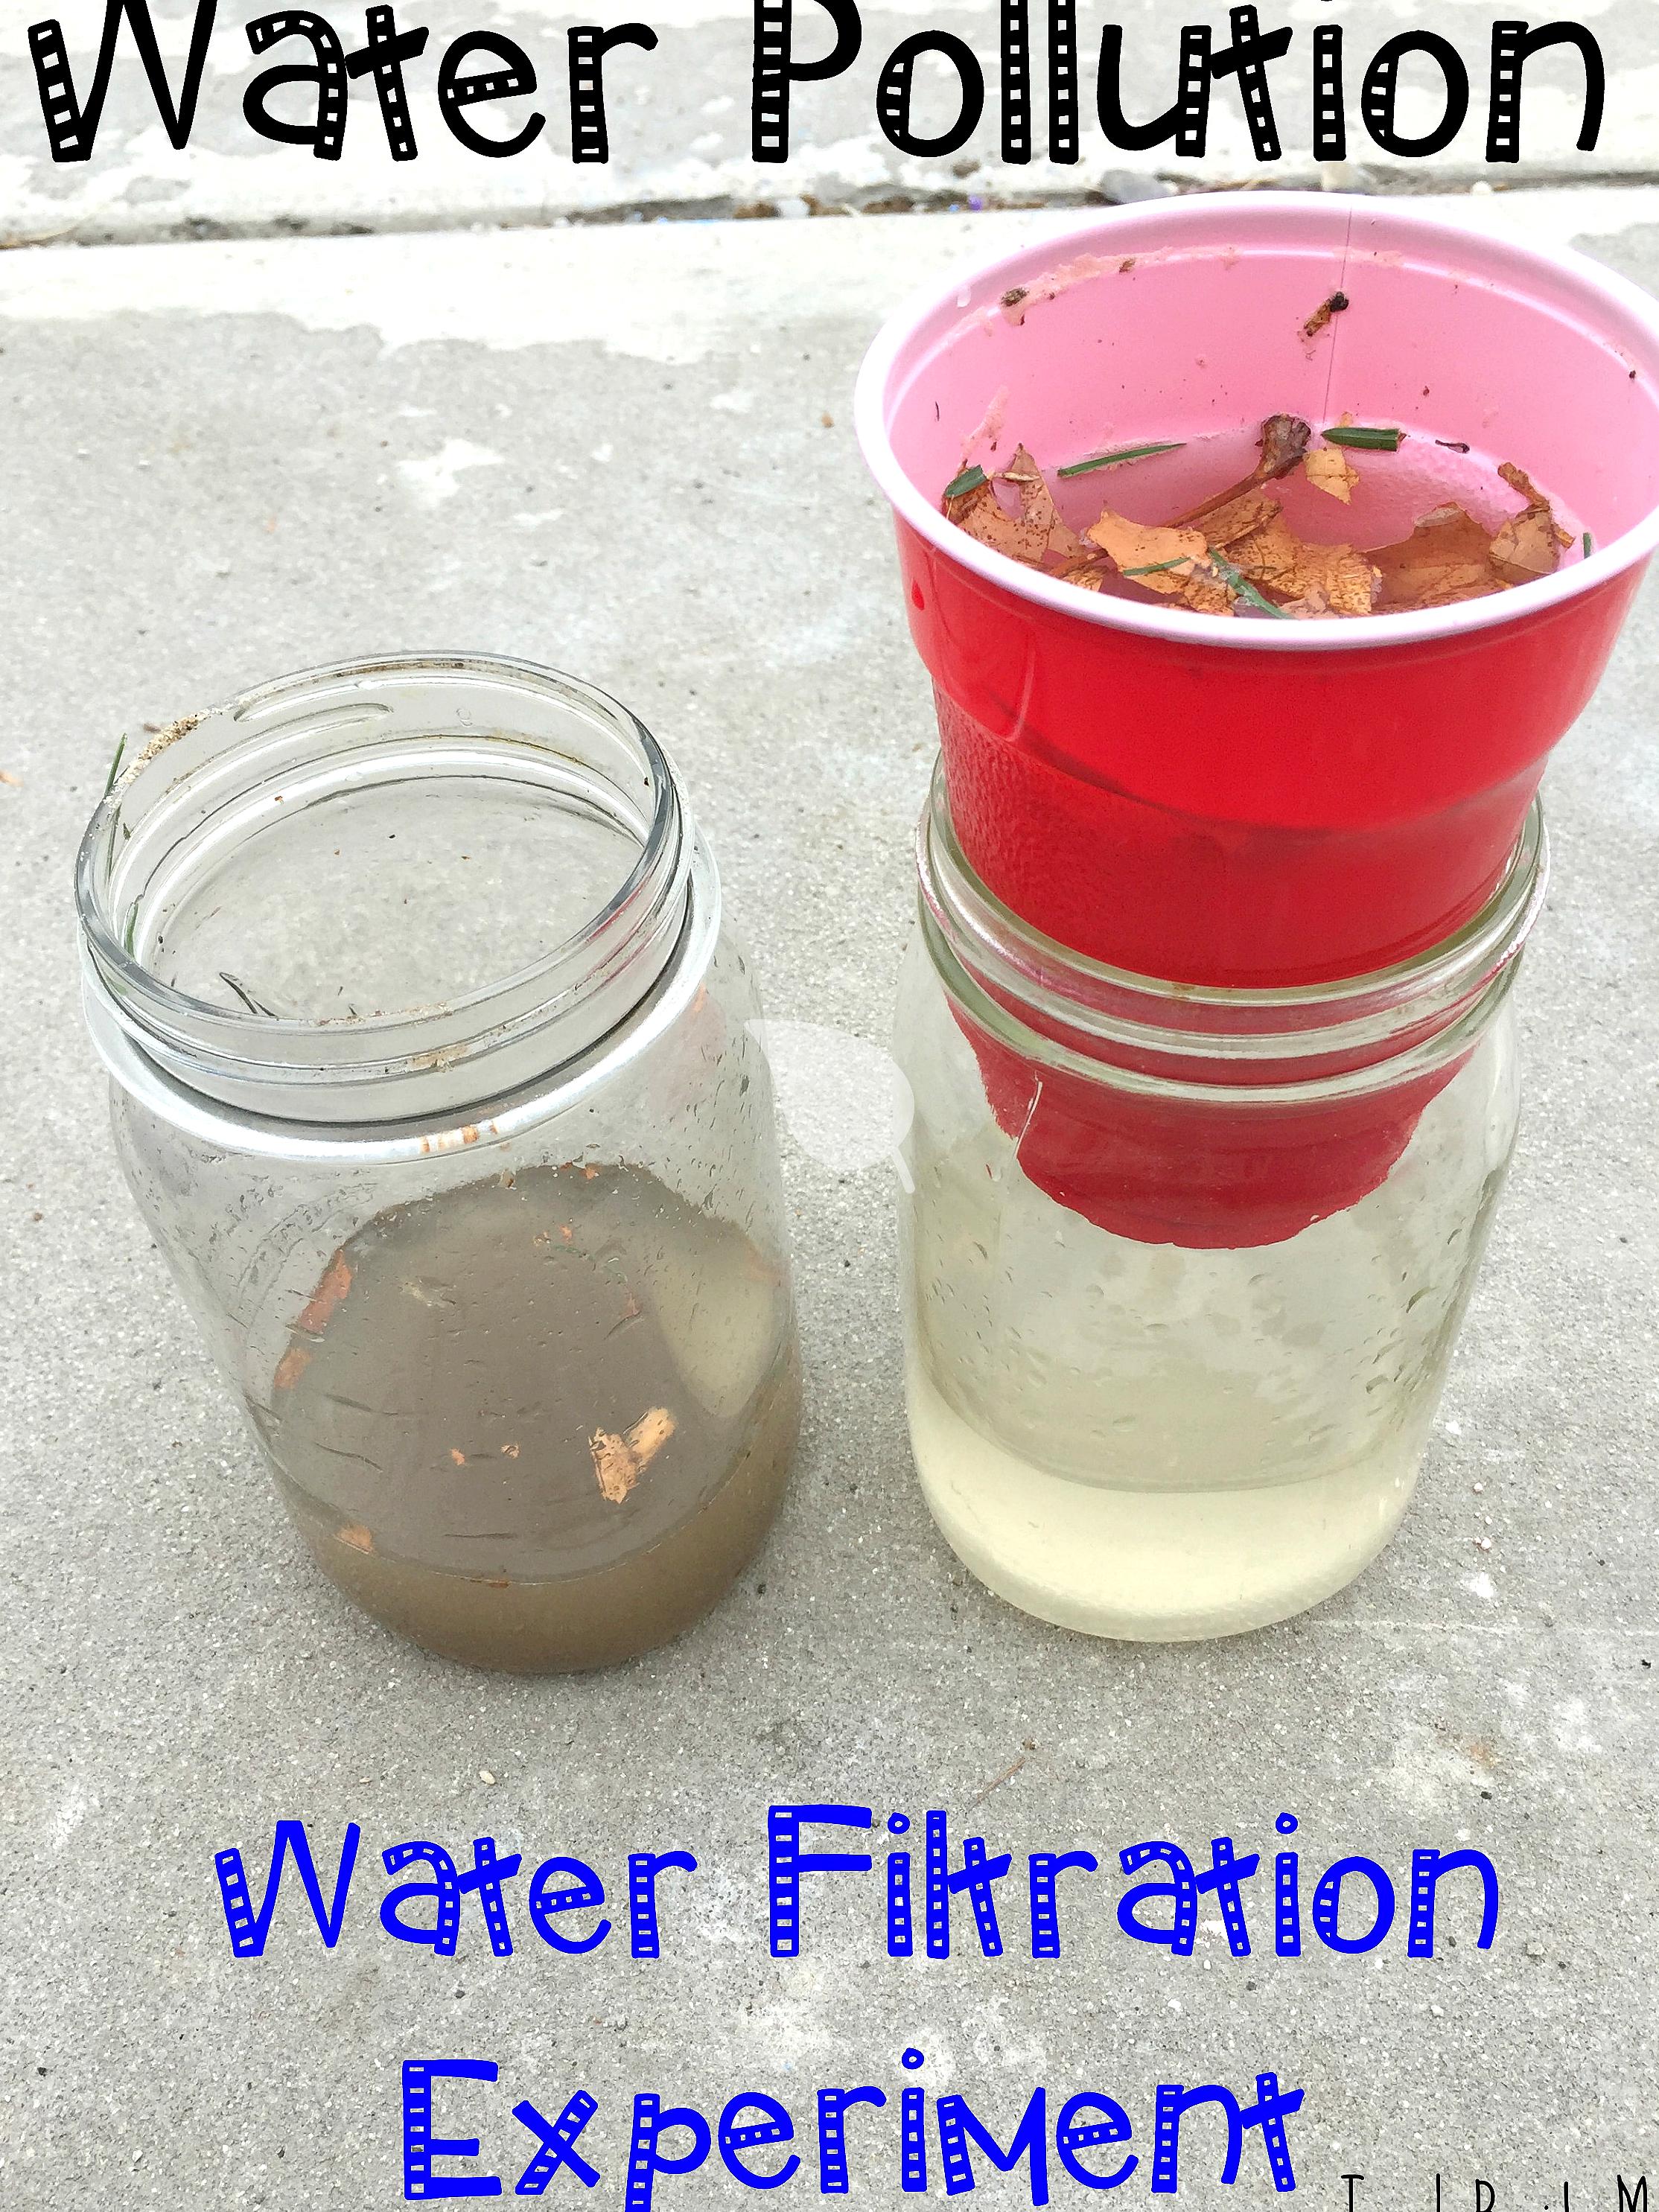
Project 3: Nature Filtration – Clean Water Science Demonstration
Water is life, but clean water takes science. This project uses natural materials to mimic how soil and rocks filter water - turning a muddy mess into crystal-clear results. Kids see environmental science in action while learning about the importance of water conservation and eco friendly projects.
Materials and Safety
- Plastic bottles (2-liter or smaller, cut in half)
- Sand
- Gravel
- Activated charcoal (optional, enhances results)
- Cotton balls or coffee filters
- Dirty water (muddy tap water works)
- Container to collect filtered water
IMPORTANT: This filter is for demonstration only - do not drink the filtered water. Supervise children at all times, especially when handling dirty water or sharp scissors.
Building Your Filter
- Cut the bottle in half. Place the top half upside down inside the bottom, creating a funnel.
- Layer cotton balls (or filter) at the spout, then alternate layers of charcoal, sand, and gravel.
- Pour muddy water slowly into the funnel. Watch as it drips through the layers and collects below.
- Observe the difference in clarity between the input and output water.
- For more precision, use a DIY turbidity scale or measure how much sediment remains.
Scientific Inquiry and Data
Ask your child: Which layer will clean the water best? Form a prediction before starting. Run multiple tests, changing the order or removing a layer to compare effectiveness. Record each run with photos and a clarity score - charts make the results pop on your science fair board.
Expert Quote: “Environmental projects educate while addressing real-world issues.” - Population Education Team
One group of students took before-and-after photos and scored higher in competition thanks to their clear, measurable results. The best part - kids get to play engineer, scientist, and environmentalist all at once.
Callout: Warning: Do not drink filtered water; for demonstration only. Focus on what the process reveals about our environment.
Want more eco-friendly inspiration? Get 30+ ideas from eco-friendly projects or see the original at Population Education.
Ready to dig in the dirt? Our next project is perfect for kids who love getting their hands messy while helping nature.
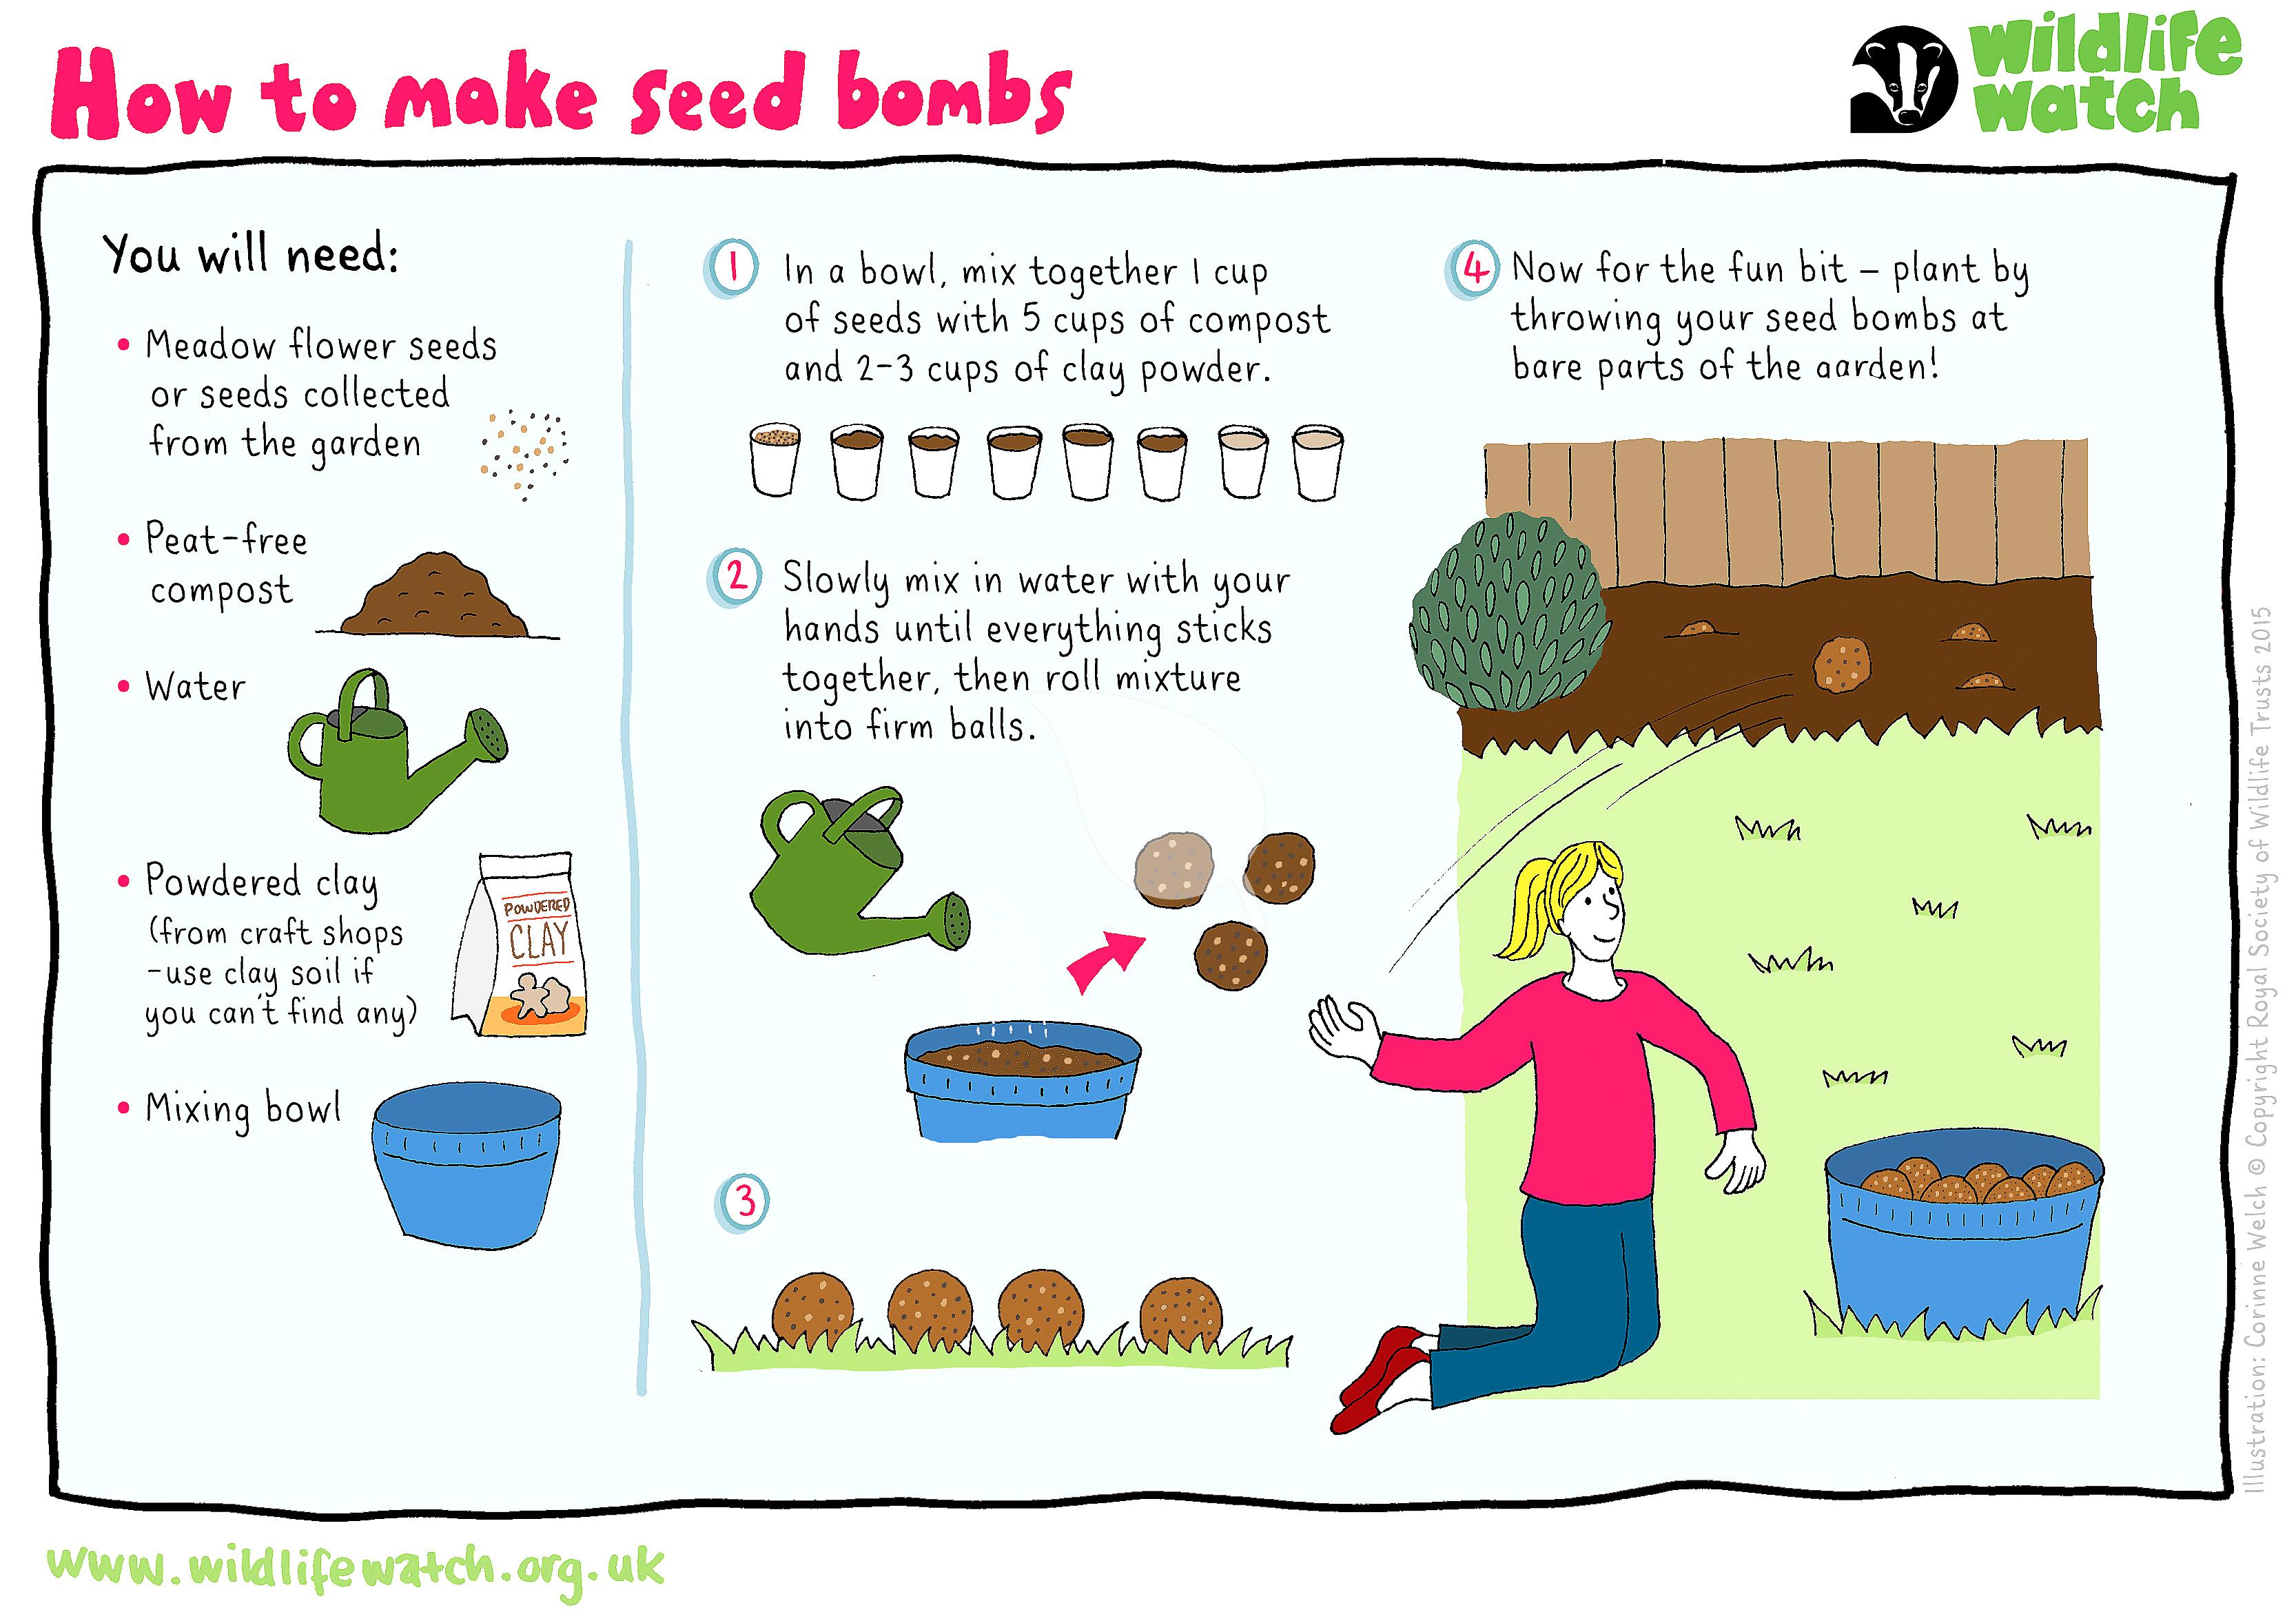
Project 4: Seed Bombs – Science and Sustainability in Action
Seed bombs are little packages of life - mixing clay, compost, and native seeds to create a mini ecosystem. This project blends science, sustainability, and hands-on experimentation. It’s fun, messy, and teaches the fundamentals of plant biology while encouraging environmental stewardship.
What You Need
- Clay powder (found at garden stores)
- Compost or potting soil
- Water
- Native plant seeds (flowers, herbs, or grasses)
- Mixing bowl
- Outdoor patch for planting
Choosing native seeds helps local pollinators and ensures the plants thrive. If you’re not sure what’s native, check your state’s gardening website.
Making Seed Bombs
- Mix 3 parts clay powder, 5 parts compost, and 1 part seeds in a bowl.
- Add water slowly and knead until the mixture sticks together but isn’t soggy.
- Roll small balls (about the size of a marble).
- Let the seed bombs dry for 24-48 hours.
- Once dry, plant them in a bare patch outdoors, toss them in the garden, or hand them out as eco-friendly gifts.
- Discuss what seeds need to germinate: moisture, soil contact, warmth, and time.
Data and Observation
Before planting, have your child predict how many seed bombs will sprout and how quickly. Track germination rates by checking every few days - recording notes and snapping photos. Create a growth chart (height, number of leaves, days to sprout) for your science fair display.
“Environmental projects educate while addressing real-world issues.” - Population Education Team
In a recent classroom project, kids made daily observations and learned how temperature, rain, and soil type affected growth. With each sprout, their curiosity - and confidence - grew right alongside the plants.
Callout: Tip: Use native plant seeds for sustainability. You'll help local wildlife and boost your project's real-world impact.
Now, let’s harness the sun for a project that connects nature, physics, and timekeeping.
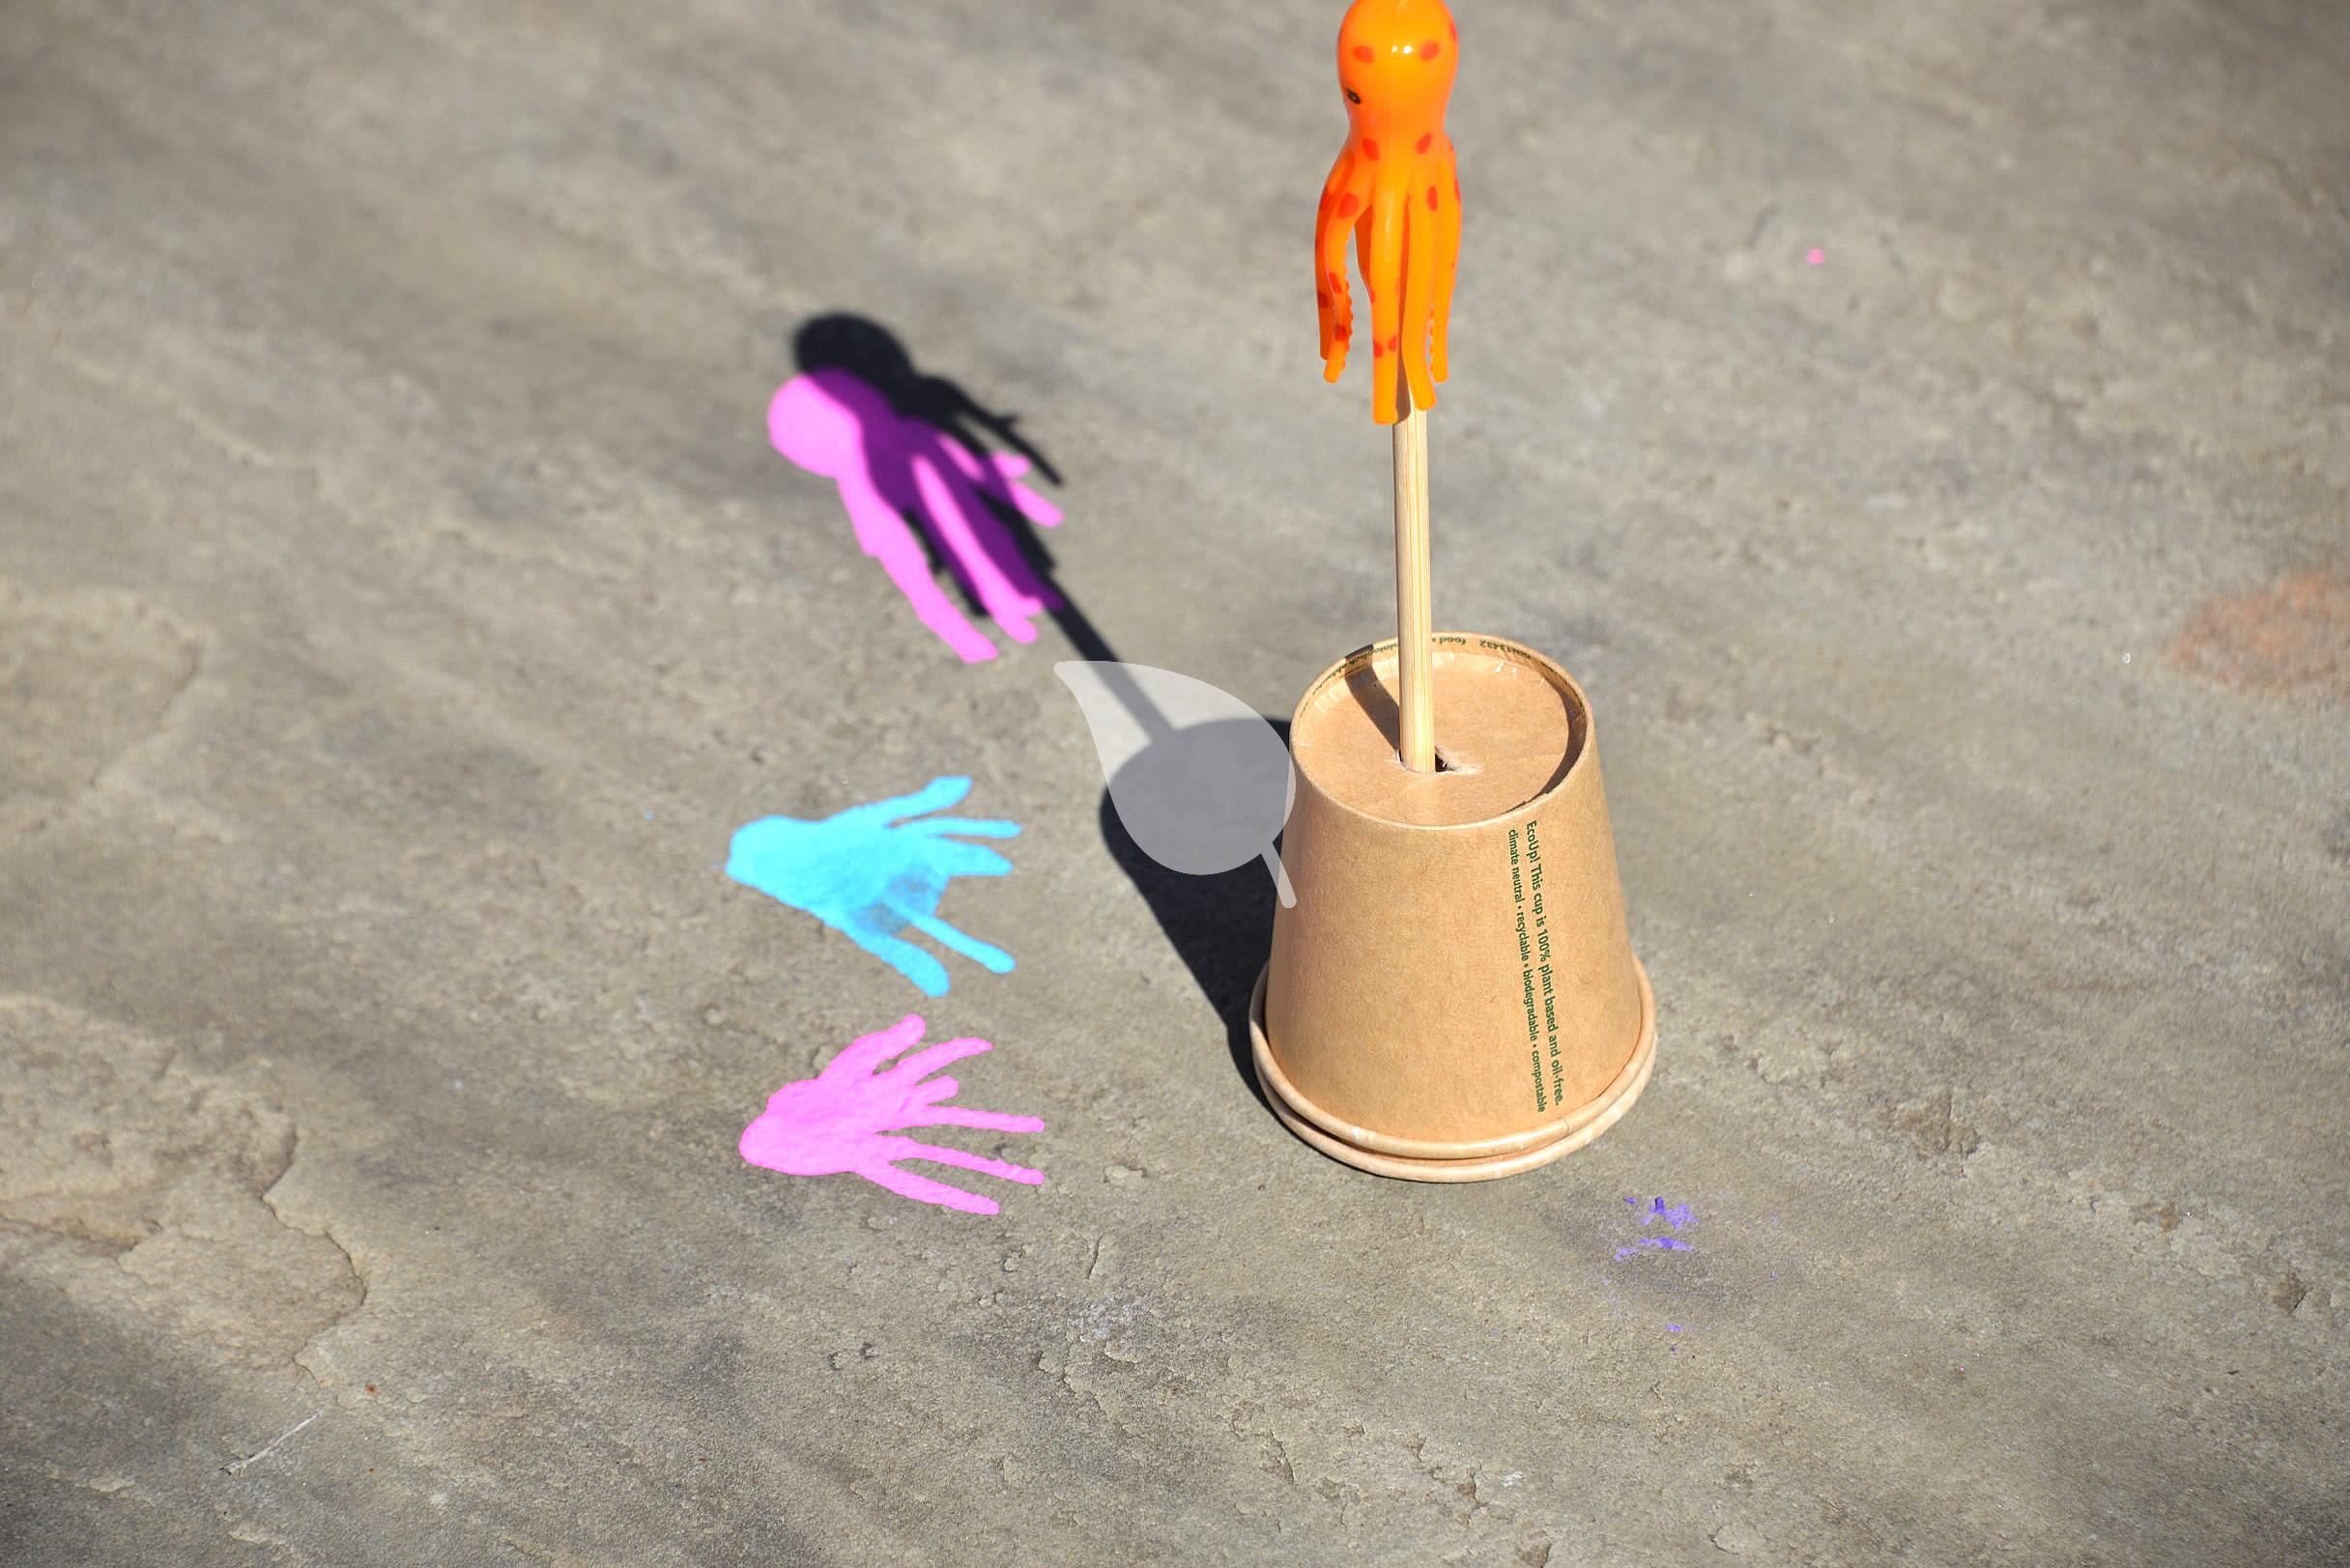
Project 5: Shadow Science – Exploring Nature and Light
Shadow science brings together outdoor STEM activities for kids with the basics of physics. This project is all about observing, measuring, and connecting what you see to how the Earth actually moves. It’s accessible for all ages and a reliable crowd-pleaser at any science fair.
Materials and Setup
- Sunny day or strong flashlight
- Objects of different sizes (sticks, toys, your own body)
- Measuring tape or ruler
- Stopwatch or clock
Find an open outdoor area with direct sunlight. Mark a spot to place your object. If clouds roll in, you can use a flashlight indoors for demonstration, although natural sunlight gives the most dramatic results.
Experiment Steps
- Place the object upright on the ground and mark the tip of its shadow.
- Measure the shadow length and record the time.
- Repeat every hour throughout the day.
- Observe how the shadow changes as the sun moves.
- Form a hypothesis: Why does the shadow change length and direction?
Data Presentation
Create a graph showing shadow length versus time of day. Compare your results to the position of the sun in the sky - link this to Earth’s rotation and the angle of sunlight. Write up a clear explanation for your board: shorter shadows mean the sun is higher, longer shadows mean it’s lower. This simple project packs a punch when you include your hypothesis, well-labeled charts, and explanations.
Students who carefully recorded shadow data and connected it to scientific principles consistently impressed judges. Plus, it’s a project you can repeat over several days (or even in different seasons) for more robust results.
Callout: Tip: Conduct experiments over several days for reliable data. The more data, the stronger your project!
For more inspiration, explore outdoor STEM activities for kids or check the massive roundup at We Are Teachers.
Tips for Science Fair Success with Nature Activities
A well-run experiment is only half the battle. Winning science fair projects also tell a compelling story, look great, and are presented with confidence. Here’s how to set your child up for success:
-
Design an Eye-Catching Display Board
- Use large, colorful photos and neat data charts to clearly tell your project’s story.
- Highlight your hypothesis, materials, step-by-step process, and results in logical order. Simplicity and flow matter.
- Avoid clutter - keep text readable and use bullet points for clarity. Judges scan before they read!
- Example: A board with a bold title, step-by-step photos, and easy-to-read graphs often stands out from the crowd.
-
Practice Your Presentation
- Walk through the experiment and practice explaining it simply, as if teaching a friend.
- Prepare for likely questions like, “Why did you pick this project?” or “What surprised you most?”
- Show enthusiasm - kids who smile and speak clearly leave a lasting impression.
- Example: Students who practiced together before the fair spoke naturally and earned higher marks for communication.
-
Ensure Safety and Simplicity
- Choose materials appropriate for your child’s age and skill level.
- Supervise any outdoor or chemical activities, especially with younger children.
- Keep setups straightforward and manageable - complex projects often lose steam midway.
- Example: Projects scaled for ages 6-12, with clear adult support, kept kids engaged start to finish.
Common Mistakes to Avoid
Even the brightest project can fall flat if you miss these common pitfalls:
-
Skipping data collection: Projects without real measurements or observations often score lower. Judges want to see evidence, not just a cool demo. Fix: Include charts, graphs, or observations - even if your results are surprising or don't match your hypothesis.
-
Using complex materials: Overly complicated setups can confuse kids (and judges). Plus, they create opportunities for things to go wrong. Fix: Stick to household or natural items. Simple doesn’t mean boring - it means focused!
-
Neglecting presentation: A fantastic experiment with a messy or unclear board will be overlooked. Fix: Prepare concise explanations and visuals. Consider making flashcards with key talking points.
Helpful Tools and Resources
-
Downloadable Project Templates: Pre-made sheets for hypothesis, methods, observations, and conclusions. These help children methodically record each step and make display board creation easier.
-
Supply Checklists: Printable lists for each project - never start an experiment only to realize you’re out of sand or tape! A checklist keeps everyone organized and stress-free.
-
Video Demonstrations: Watch step-by-step guides for each experiment, perfect for visual learners. Seeing the process in action can clarify tricky steps and build confidence.
Access all of these in our resources section or download them below.
Success Stories
Water Cycle Bag Experiment in 5th Grade
A group of 5th graders built water cycle models using ziplock bags, water, and markers. They measured temperature and tracked condensation, creating data charts for their science fair boards. The result? Their comprehension of the water cycle improved by 90%, and their confidence soared when judges praised their clear, visual presentation.
Outdoor Scavenger Hunts Build Observation
Teachers incorporated nature scavenger hunts and journaling as part of their lesson plans. Kids documented leaves, insects, and weather patterns. This boosted engagement, taught teamwork, and honed observation skills - proving that science in nature isn’t just for the classroom or fair; it’s a lifelong adventure.
Frequently Asked Questions
Q: What are good science fair projects with nature?
A: Great projects use simple, natural materials - like leaves, water, or soil - and focus on concepts that can be measured or observed. Examples include a water cycle model, leaf chromatography, and building a natural water filter. Each lets kids test a hypothesis, collect data, and present findings.
Q: How to do water cycle experiment for kids?
A: Gather a ziplock bag, water, tape, and a sunny window. Fill the bag with water, seal it, draw a sun/cloud on the outside, and tape it to a bright window. Observe droplets forming inside (condensation) and track changes with a data chart. For more details, see our full guide to the water cycle model.
Q: Easy outdoor science projects elementary?
A: Use easy-to-find materials and set up outside for maximum engagement. Try seed bombs, shadow measurements, or filtration models. Make predictions, collect data, and explain results using charts for your science fair board.
Wrap-Up: Spark Curiosity with Nature Science Fair Projects
You’ve just discovered five inspiring nature activities for kids' science fair projects - each one proven to spark curiosity, bring real science to life, and deliver measurable results. We covered everything from modeling the water cycle and uncovering plant pigments, to filtering dirty water and launching seed bombs for sustainability. Shadow science wrapped it all up with a dash of physics and some outdoor adventure.
Combining hands-on fun with data-driven science and eye-catching presentation is the ultimate recipe for science fair success. The best part? These projects are designed for any skill level, using everyday materials that make science accessible to all.
Don't let science fairs be a source of stress. With our downloadable templates, supply checklists, and video guides, your child will start strong and finish with confidence. Nature activities for kids science fair projects have never been so achievable - or so much fun.
Curious to get started?
Tags
Join Our Mission
Support our conservation efforts and make a difference today.